FAQ. This is the list of the most frequently asked questions.
- The default Arduino folder (under Windows,Documents / Arduino) must contain only the Gnuvario project files; in fact, two files:
- Gnuvario-E: contains Gnuvario-E.ino
- libraries: the project libraries, and only these.
- You must start the vario with the switch and without the sdcard, before connecting it to the PC via USB.
- In the menu Tools of the Arduino IDE, the chosen card must be ESP32 Dev Module, the partition scheme Minimal SPIFFS (1.9 MB APP with OTA / 180 KB SPIFFS), and the COM port that corresponding to vario.
- Start the vario with the switch, before connecting it to the PC via the USB socket, then start the compilation / flashing operation.
- If this does not work: start the vario just when flashing will start, whether with the Arduino IDE, the PlatformIO IDE, or the ‘Flash tools’.
For example, with the IDE Arduino: wait for the line “Linking everything together …”, then switch on the vario. It is even possible to wait for the message “the selected serial port does not exist or your Arduino is not connected __…..__…..” to turn on the vario.
another example, with PlatformIO: wait for the line “Linking .pio \ build \ esp32dev \ firmware.elf”, then switch on the vario. It is even possible to wait for the message “Connecting ……..____…..” to switch on the vario.
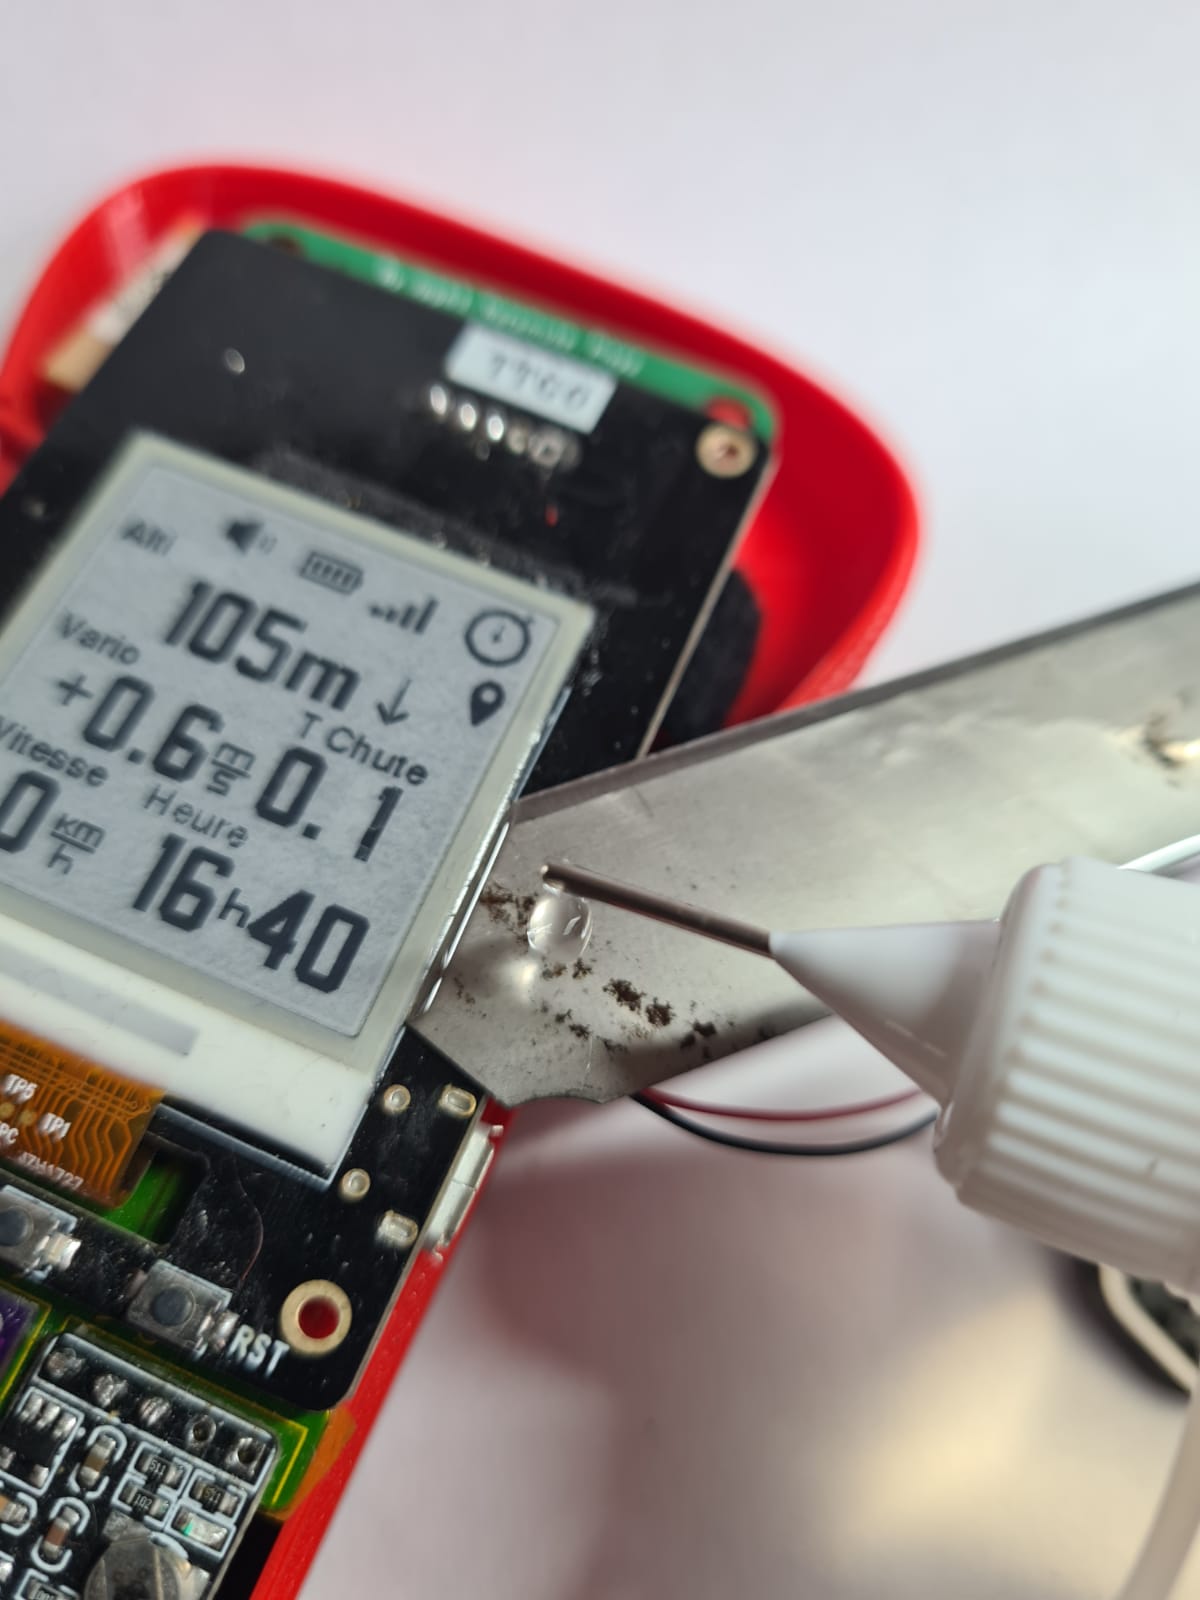
The E-Paper screen is fixed with double-sided tape on the PCB of the TTGO T5. If the screen is incorrectly positioned, it is possible to peel it off using a cutter blade to reposition it. You can add a few drops of alcohol on the blade to dissolve the glue.
WARNING. The screen is very thin and very fragile. It can be easily broken during this operation. In particular, do not apply pressure to the screen with the cutter. Keep the blade parallel to the circuit board.
No automatic update is presented.
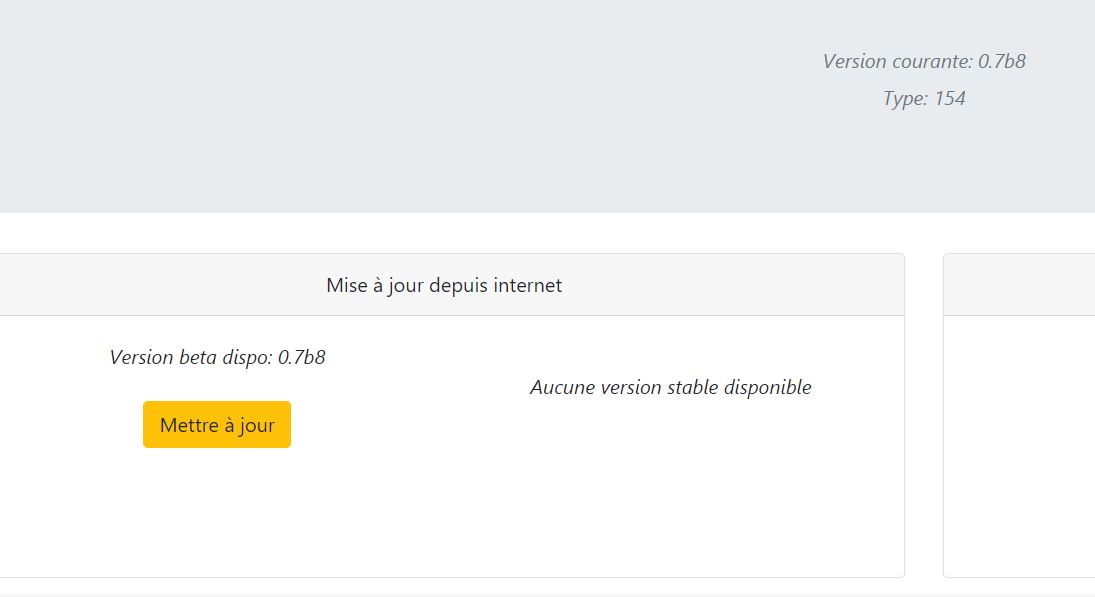
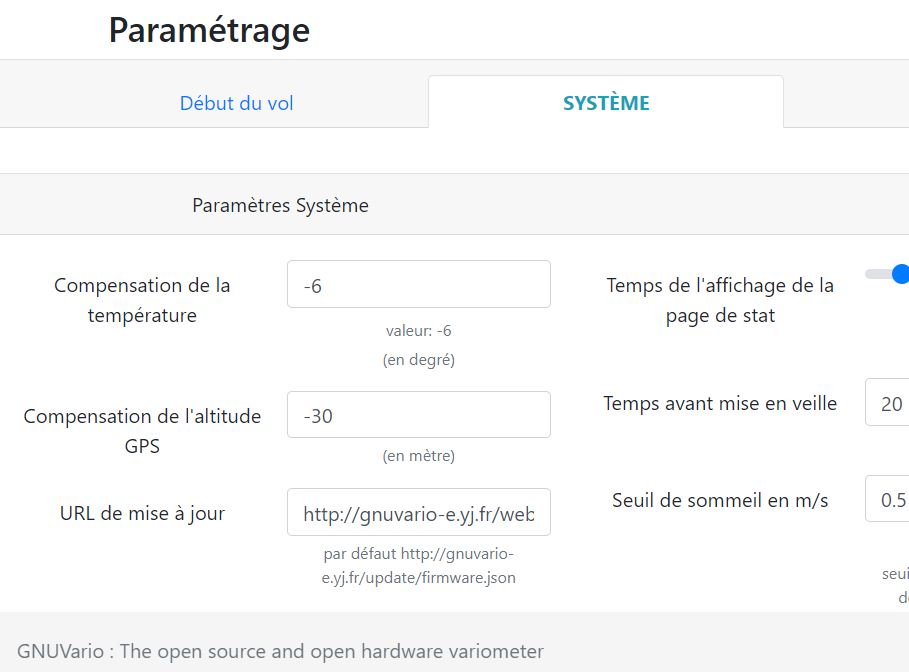
Check in the configuration parameters that the URL of the resource site is correct
http://gnuvario-e.yj.fr/webupdate/checkversion
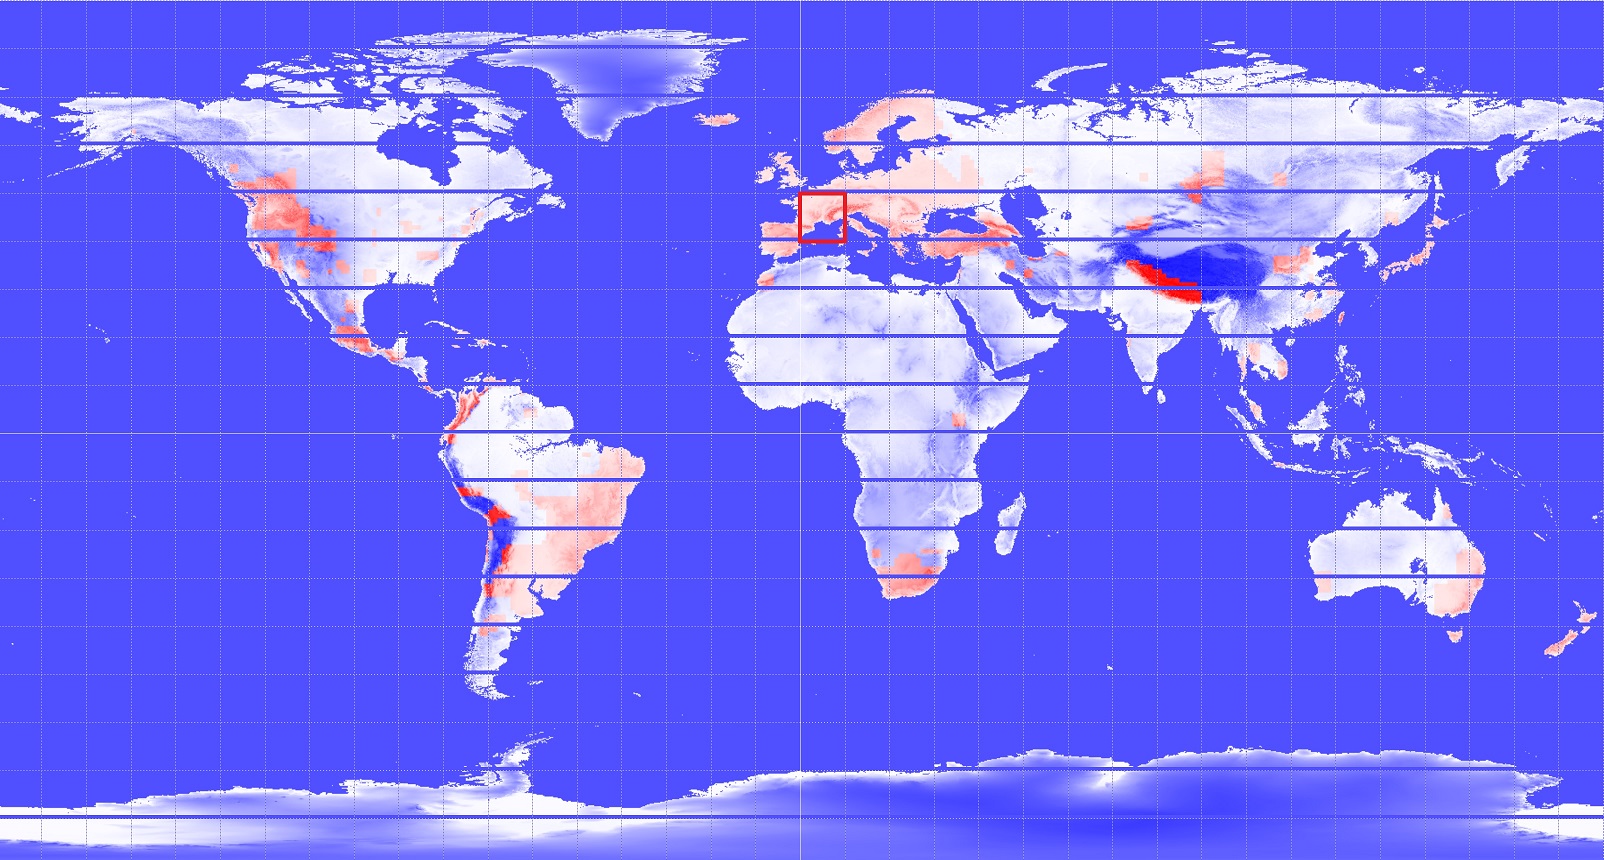
If when you have a GPS position and if you press the left button for 3 seconds the ground altitude is not calibrated, it is likely that you do not have the correct topographic files.

Download the topographic files for your region and copy them to the AGL folder on your microSD card.
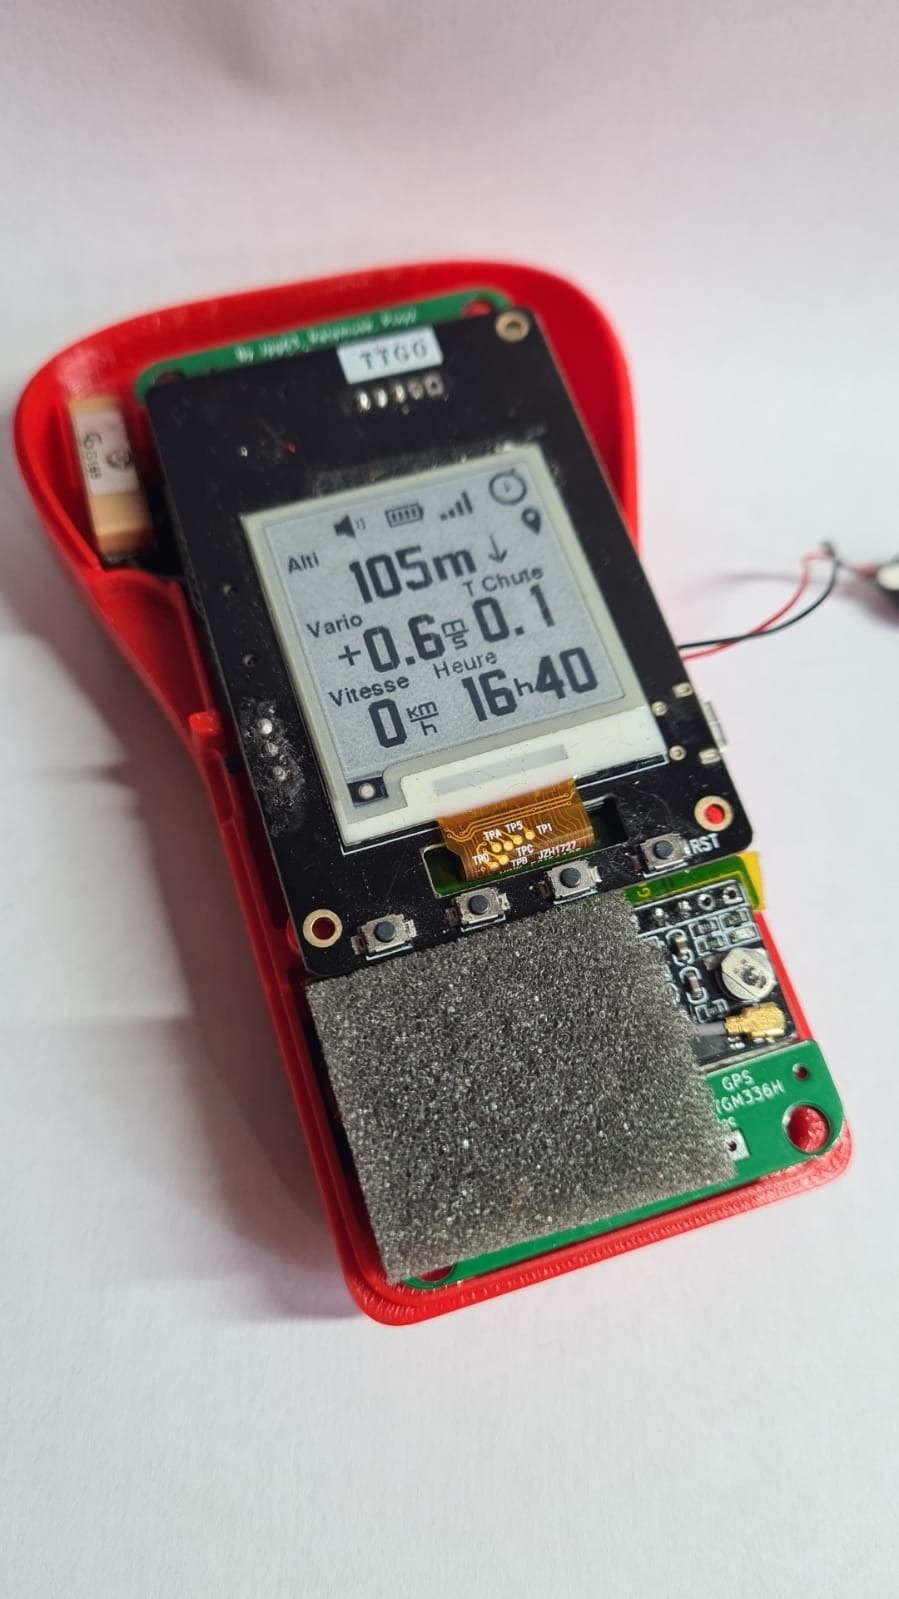
The MS5611 barometer on the CJMCU-117 is very light sensitive. Place a small piece of foam or neoprene on the pad to protect it from direct sunlight that could pass through the buttons on the case.
Be careful to calculate the thickness correctly so as not to damage the components when the case is closed.
Also prefer a dark colored case to reduce the light inside.
We have identified several situations leading to random crashes of the vario.
1. List of debugs:
Uncomment only the lines #define PROG_DEBUG and #define DATA_DEBUG in the Arduino\libraries\VarioLog\DebugConfig.h file.
#define ENABLE_DEBUG

#if defined(ENABLE_DEBUG)

//              DEBUGING MODE
#define PROG_DEBUG			  //debug principal program
//#define HARDWARE_DEBUG
//#define IMU_DEBUG			  //debug IMU
//#define CAL_DEBUG
//#define I2CDEV_SERIAL_DEBUG   //debug I2Cdev
//#define DEBUG_SERIAL_NMEA_1
//#define SCREEN_DEBUG
//#define SCREEN_DEBUG2
//#define GPS_DEBUG
//#define BUTTON_DEBUG
//#define TONEDAC_DEBUG
//#define MS5611_DEBUG
//#define KALMAN_DEBUG
//#define ACCEL_DEBUG
//#define EEPROM_DEBUG
//#define NMEAPARSER_DEBUG
//#define SDCARD_DEBUG
//#define IGC_DEBUG
#define DATA_DEBUG
//#define BT_DEBUG
//#define WIFI_DEBUG
//#define SOUND_DEBUG
//#define AGL_DEBUG
//#define SQL_DEBUG
//#define BEARING_DEBUG
//#define TWOWIRESCH_DEBUG
//#define POWER_DEBUG
//#define MEMORY_DEBUG
2. Reduce the speed of the I2C bus:
The most common problem is a loss of altitude information. The CJMCU-117 module which integrates the MS5611 barometer communicates with the ESP32 chip with the I2C protocol . You can try to reduce the BUS communication speed from 400Khz to 100Khz.
To do this, change the value 400000UL to 100000UL from line 355 of the file Arduino\libraries\HardwareConfig\HardwareConfigESP32.h
/* Set the freq */
#define VARIO_TW_FREQ 400000UL

to

/* Set the freq */
#define VARIO_TW_FREQ 100000UL
3. Quality of solders
It often happens that the solders are the cause of the bugs, even if they appear to be correct. Try to redo the solders on the circuit board.