Code
Les codes sources du Gnuvario-E
Compilation avec VSCode - PlatformIO
En préalable, il faut télécharger localement les sources depuis le dépot GIT.
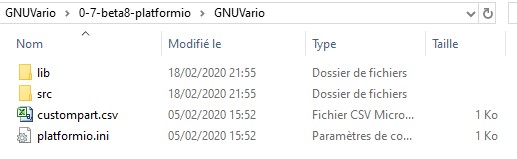
Le répertoire local doit contenir à minima :
- le dossier src/, qui contient le fichier Gnuvario-E.cpp
- le dossier lib/, qui contient les librairies nécessaires
- les fichiers platformio.ini et custompart.csv
Dans VSCode, cliquer sur l’icone ‘PlatformIO: Home’ dans la barre horizontale en bas. La page PlatformIO Home va s’afficher dans l’IDE.
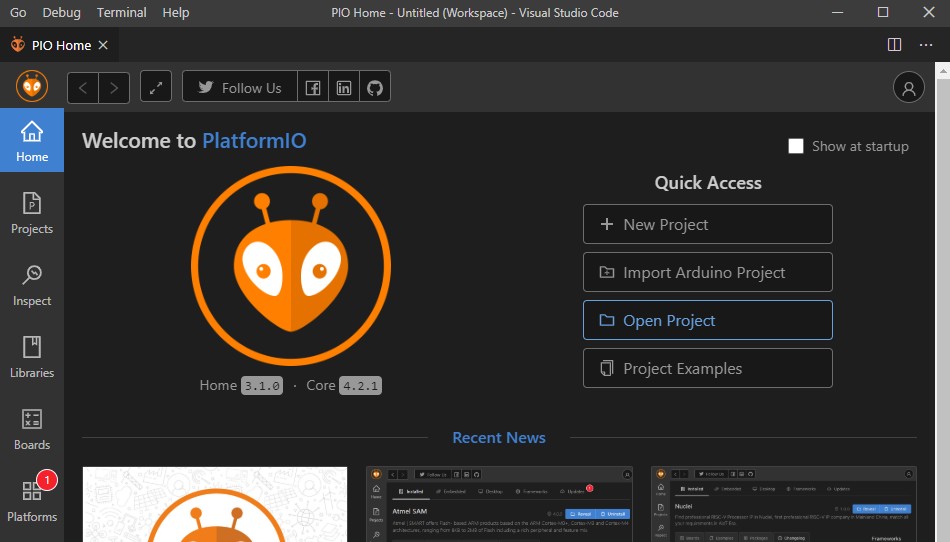
Cliquer sur ‘Import Arduino Project’.
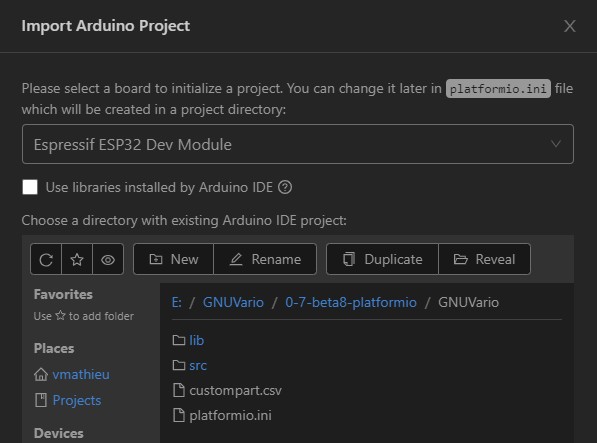
- sélectionner le ‘board’. Pour accélérer la sélection, saisir esp32, puis choisir ‘Expressif ESP32 Dev Module’
- ne pas cliquer ‘Use libraries installed by Arduino IDE’
- sélectionner le dossier qui contient le code récupéré du dépôt git
- cliquer sur le bouton ‘Import’
Le projet apparait dans la colonne gauche (EXPLORER) de l’IDE ; il est possible d’explorer les différents fichiers de celui-ci.
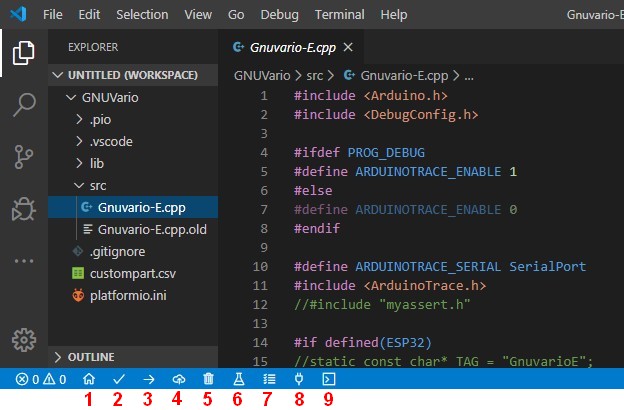
Dans la barre horizontale du bas, plusieurs icônes liées à PlatformIO et au projet courant apparaissent.
Les icones les plus intéressantes sont :
- (1). PlatformIO: Home : ouvrir la fenêtre PlatformIO Home
- (2). PlatformIO: Build : compiler le code
- (3). PlatformIO: Upload : compiler de code, et le charger dans le vario
- (8). Platformio: Serial Monitor : ouverture d’un terminal série basique
Vous devez maintenant choisir la combinaison écran/circuit imprimé que vous possédez. Pour cela allez dans le dossier src, fichier HardwareConfig.h
Le choix de la combinaison se fait en décommentant la ligne correspondante à votre combinaison. Ici la version 293.
//VERSION
//#define VARIOVERSION 154     //PCB Version 1 avec ecran 1.54 / PCB version 1 with 1.54" screen
//#define VARIOVERSION 254     //PCB Version 2 avec ecran 1.54 / PCB Version 2 with 1.54" screen
//#define VARIOVERSION 290     //PCB Version 2 avec ecran 2.9" paysage / PCB version 2 with 2.9" screen landscape (TTGO-T5-V2.4 before 12/2020)
//#define VARIOVERSION 291     //PCB Version 2 avec ecran 2.9" portrait / PCB version 2 with 2.9" screen portrait (TTGO-T5-V2.4 before 12/2020)
//#define VARIOVERSION 292     //PCB Version 2 avec ecran 2.9" paysage /PCB version 2 with 2.9" screen landscape  (Ecran/Screen Good Display GDEW029M06)
#define VARIOVERSION 293     //PCB Version 2 avec ecran 2.9" portrait / PCB version 2 with 2.9" screen portrait (Ecran/Screen Good Display GDEW029M06)
//#define VARIOVERSION 294     //PCB Version 2 avec ecran 2.9" portrait / PCB version 2 with 2.9" screen portrait (TTGO-T5-V2.4 after 12/2020 Screen number DKEG0290BNS800F6 /QYEG0290BNS800F6C02 ) For test purpose only
//#define VARIOVERSION 354     //PCB Version 3.1 avec ecran 1.54 / PCB Version 3.1 with 1.54" screen
//#define VARIOVERSION 390     //PCB Version 3.1 avec ecran 2.9" paysage / PCB version 3.1 with 2.9" screen landscape (TTGO-T5-V2.4 before 12/2021)
//#define VARIOVERSION 391     //PCB Version 3.1 avec ecran 2.9" portrait / PCB version 3.1 with 2.9" screen portrait (TTGO-T5-V2.4 before 12/2021)
//#define VARIOVERSION 392     //PCB Version 3.1 avec ecran 2.9" Good Display GDEW029M06 paysage / PCB version 3.1 with 2.9" screen landscape  (Ecran/Screen Good Display GDEW029M06)
//#define VARIOVERSION 393	   //PCB Version 3.1 avec ecran 2.9" Good Display GDEW029M06 portrait / PCB version 3.1 with 2.9" screen portrait (Ecran/Screen Good Display GDEW029M06)
//#define VARIOVERSION 395     //PCB Version 3.5 avec ecran 2.9" paysage (futur BNO085/86)
//#define VARIOVERSION 396     //PCB Version 3.5 avec ecran 2.9" portrait (futurBNO085/86)
Pour compiler le code, il vous suffit de:
- démarrer le vario
- relier le vario au PC via la micro USB
- cliquer sur l’icône PlatformIO: Upload
La compilation va s’effectuer et si pas d’erreur, le code compilé sera chargé dans le vario et celui-ci redémarrera.
Pour préparer la carte microSD, c’est ICI