3Dcase
Print or have your case printed
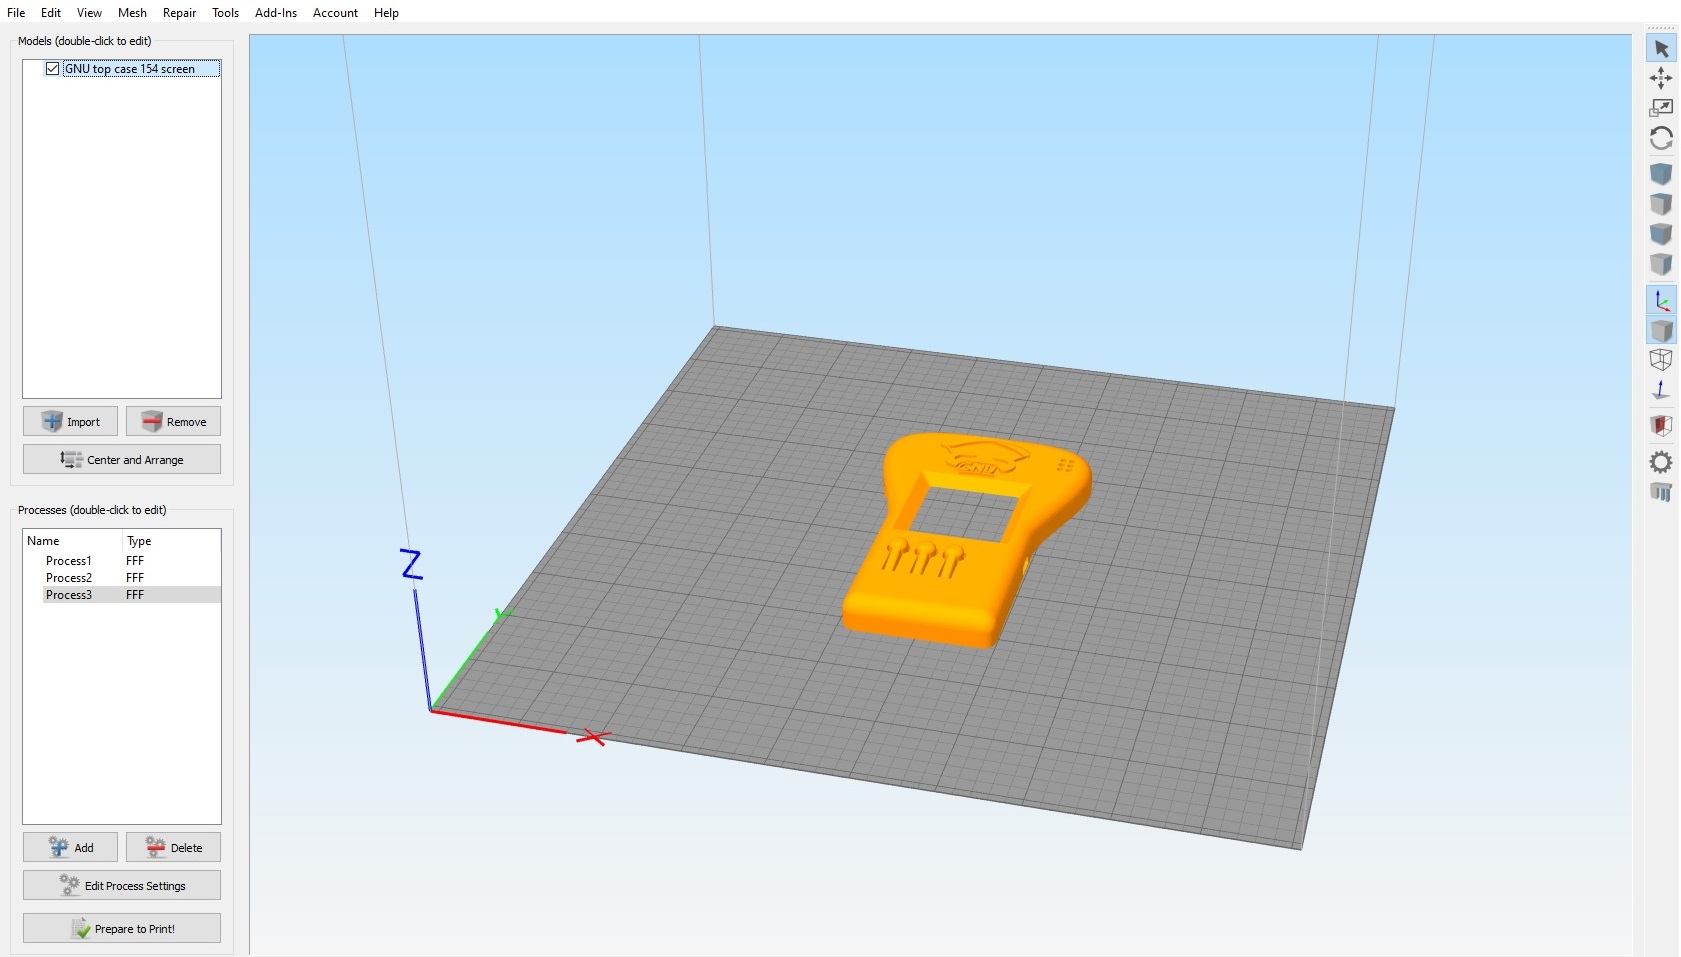
Top case
To create a nice rounded edge, the ideal is to print the upper case in layers of 0.1mm. But in order to reduce the printing time and have better grip of the first layers, we will create several printing steps. We will also see how to create and optimize the supports for easy removal.
Generate and optimize the printing of supports material:
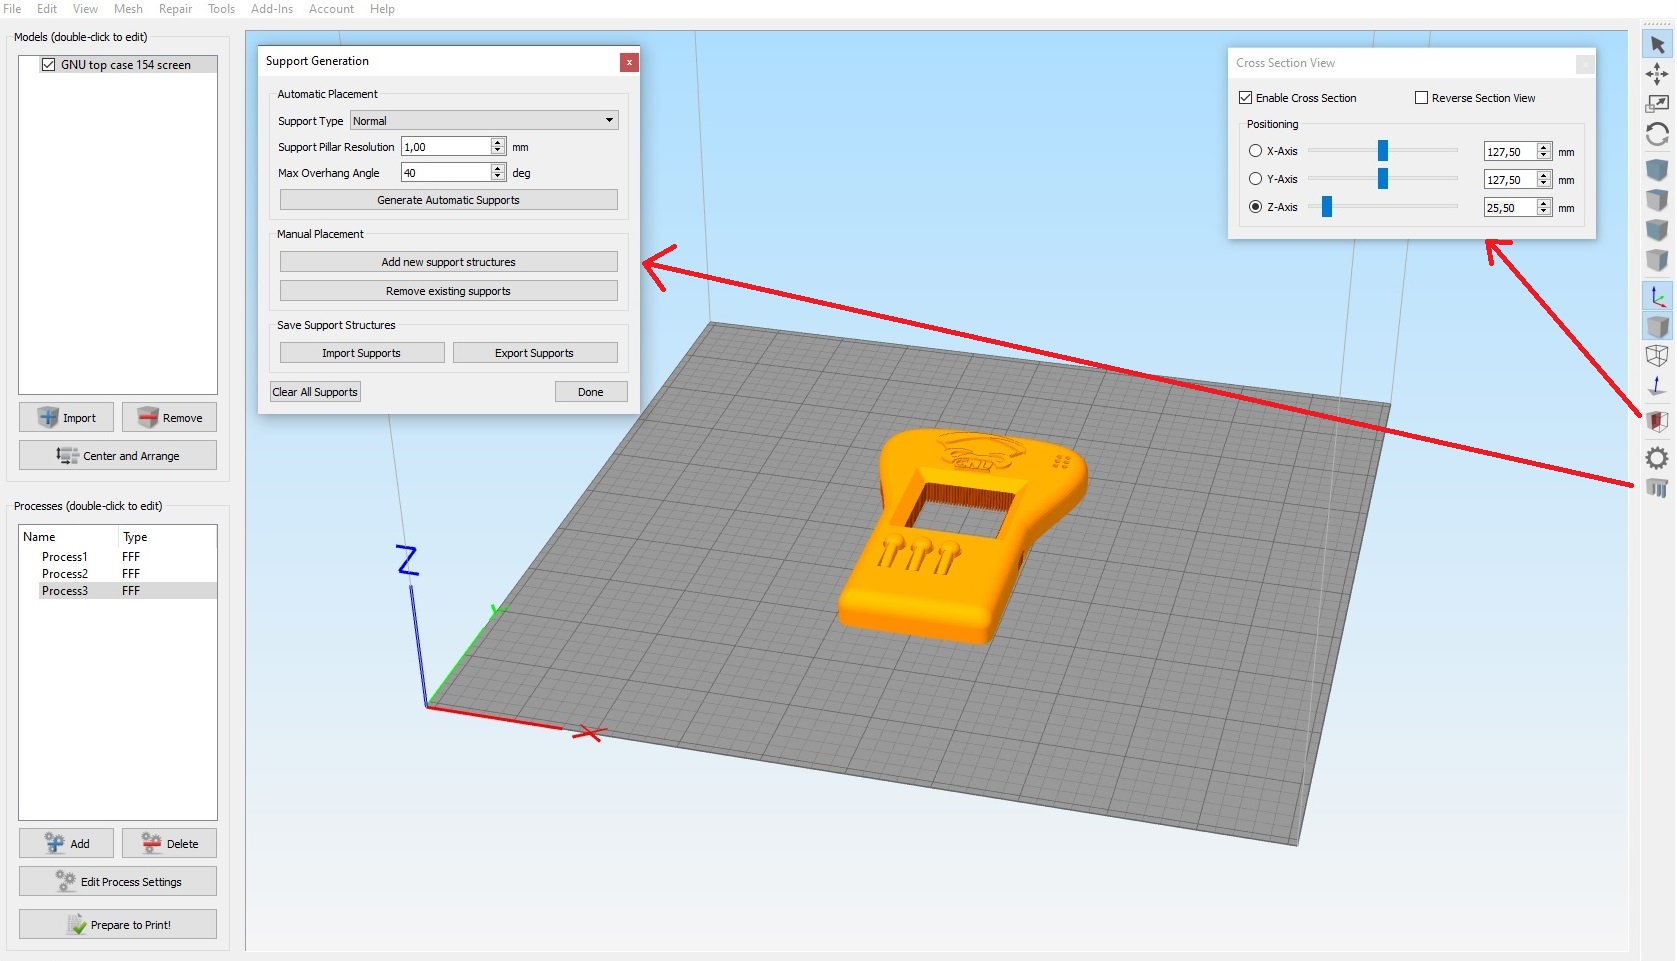
Open the “Cross-section view” and “Support generation” windows. Put 1mm at “Support pillar resolution” and 40 ° at “Max overhang angle”. Then create the supports by pressing on “Generate automatic supports”
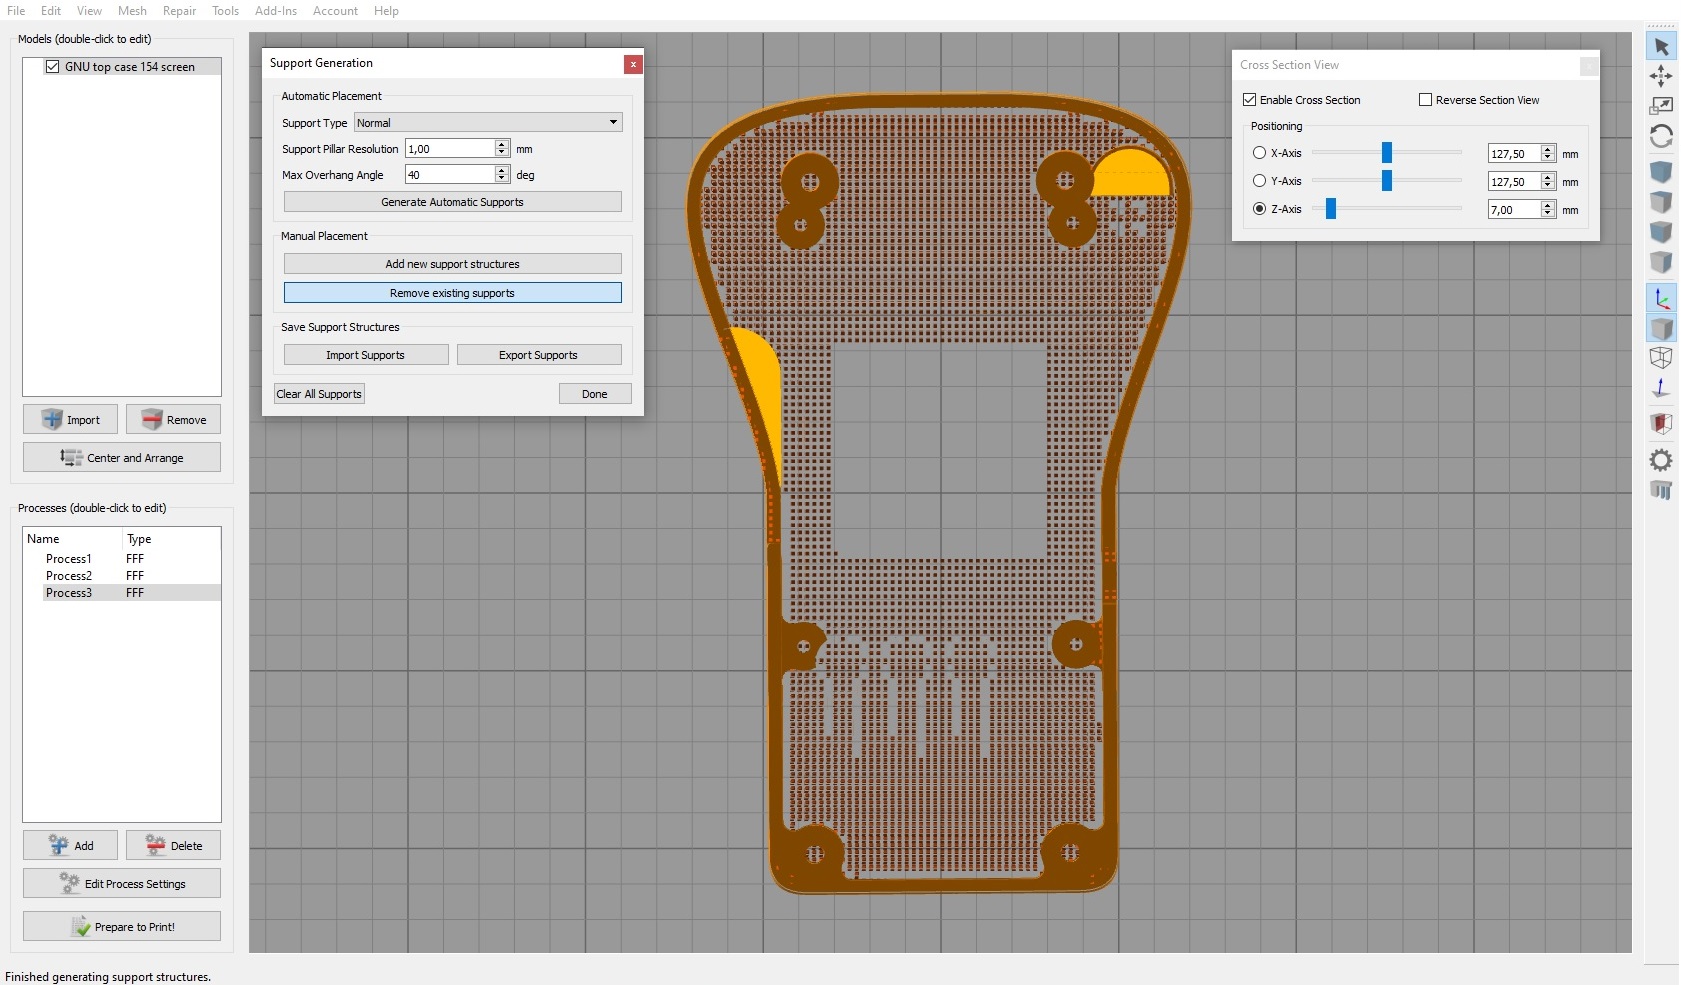
Then put yourself in top view and set the Z axis of the cross section to 7mm. You will be able to remove the supports in the screw holes by pressing “delete the current supports” and by clicking on each stick in the holes.
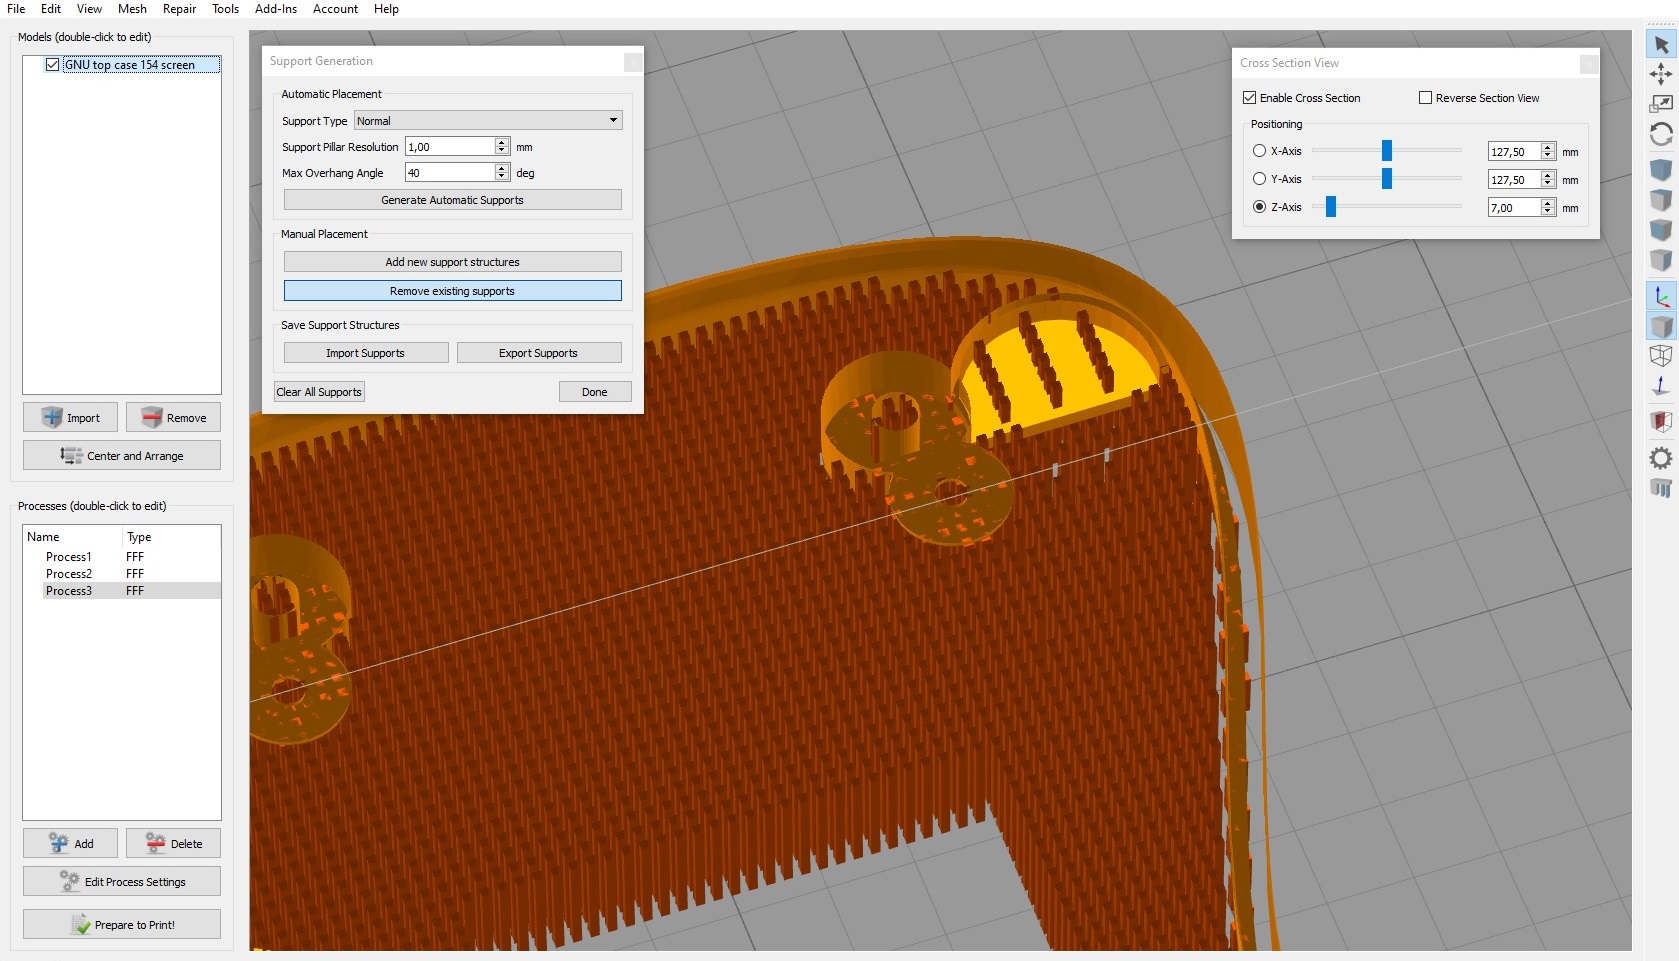
It now remains to optimize the supports in the notch of the speaker. Adjust the view of the box to see the supports clearly then remove the supports as on the image below (left click of the mouse for the view rotation, right click for the translation). They will be much easier to remove.
Processes management
The idea is to cut the print into several slices by changing the settings according to the height.
In this example, we have 3 processes.
Process1:
This is to adjust the first layers so that they hang well on the tray.
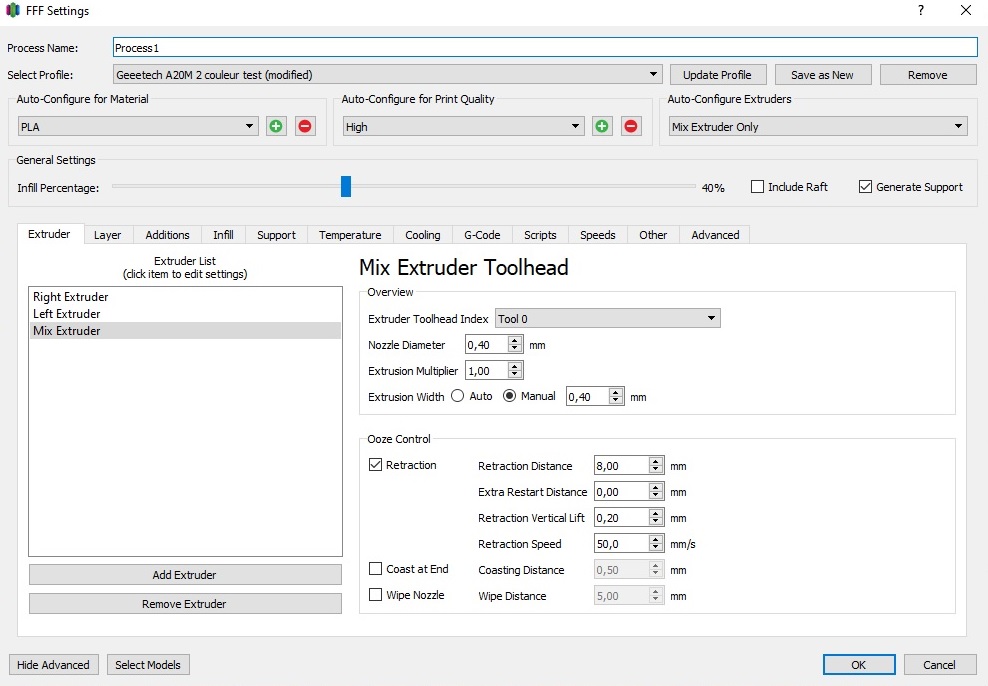
“Extruder” tab:
The distance and speed of retraction will depend on your printer. The vertical retraction elevator allows the nozzle to be lifted a little after a retraction and thus avoid touching the part during a movement.
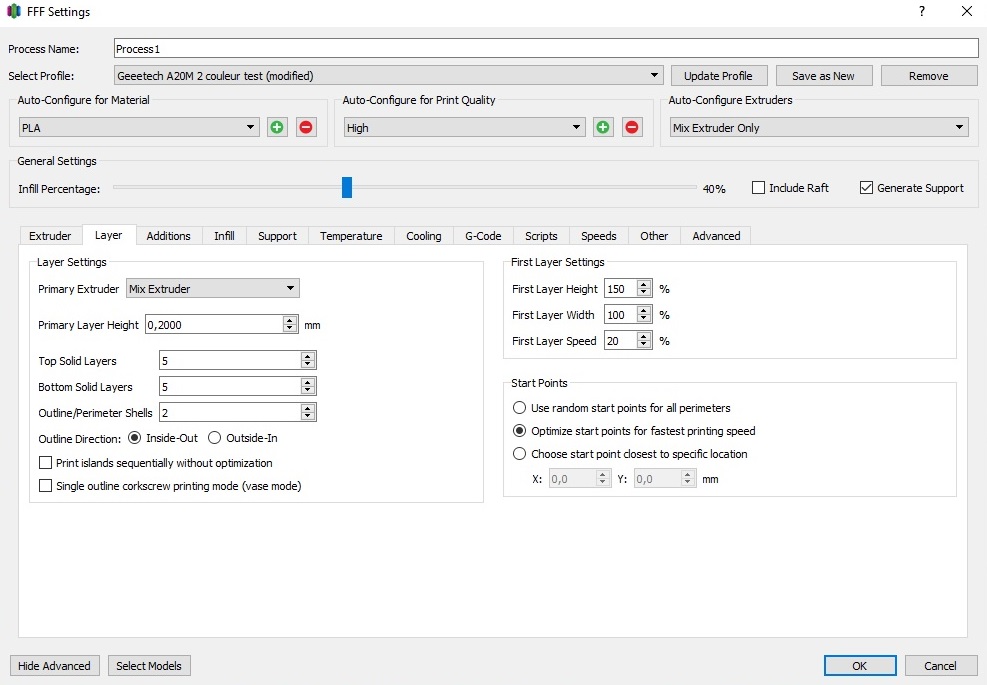
“Layer” tab
We start with 0.2mm layers for this piece. With a first layer height of 150%, the first layer will be 0.3mm. A speed of 20% compared to the overall printing speed allows good support of the supports.
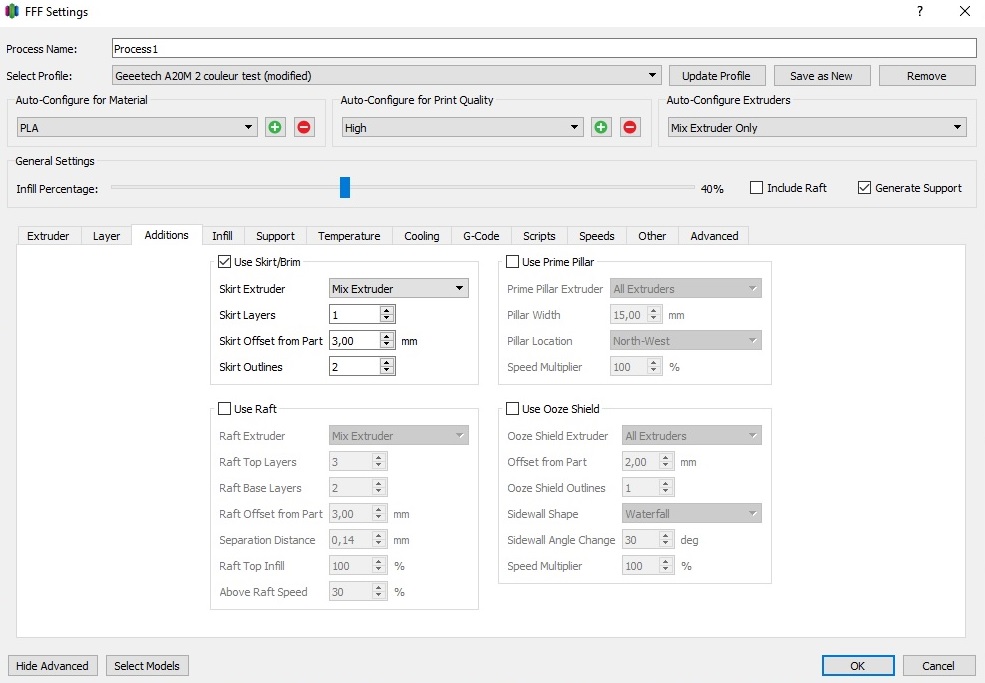
“Additions” tab
Adding a skirt around the room, just to purge the nozzle.
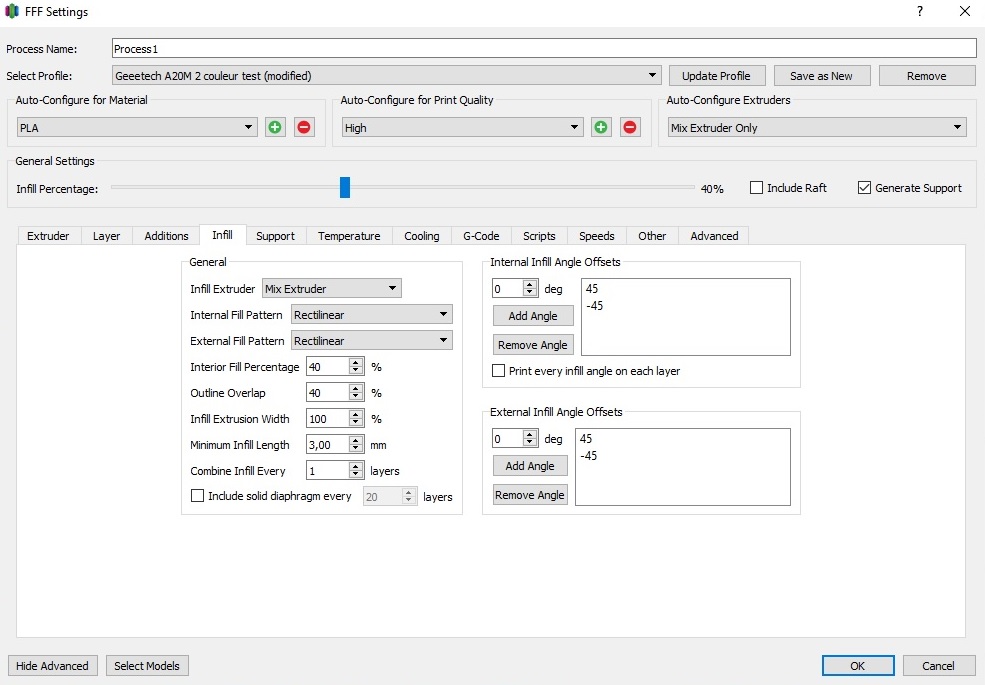
“Infill” tab:
At your convenience, here 40% material and straight filling.
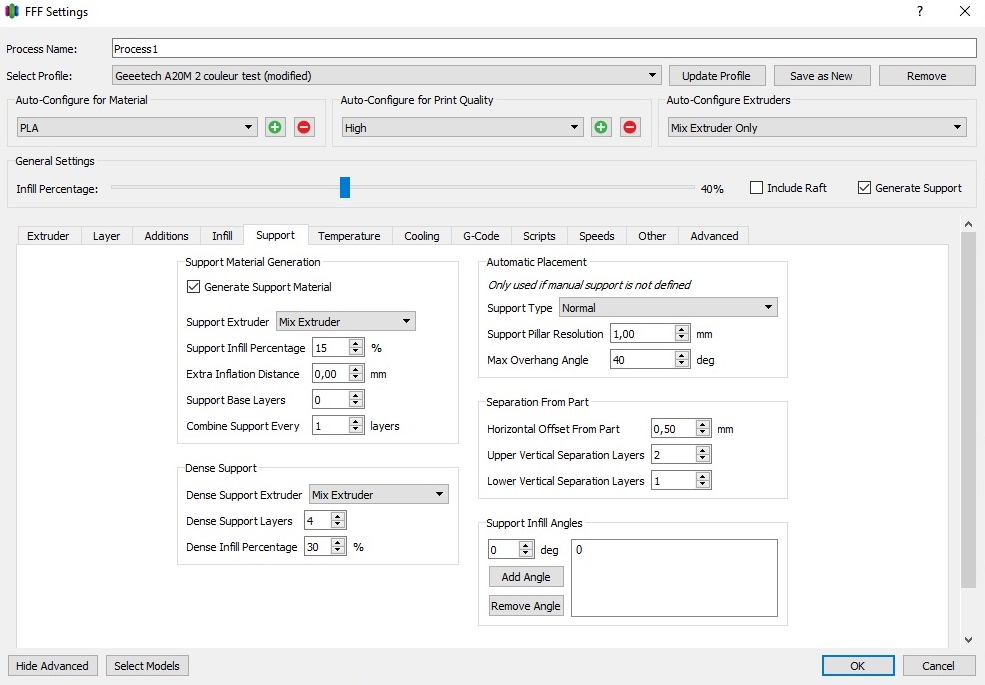
“Support” tab
Important parameters for this part!
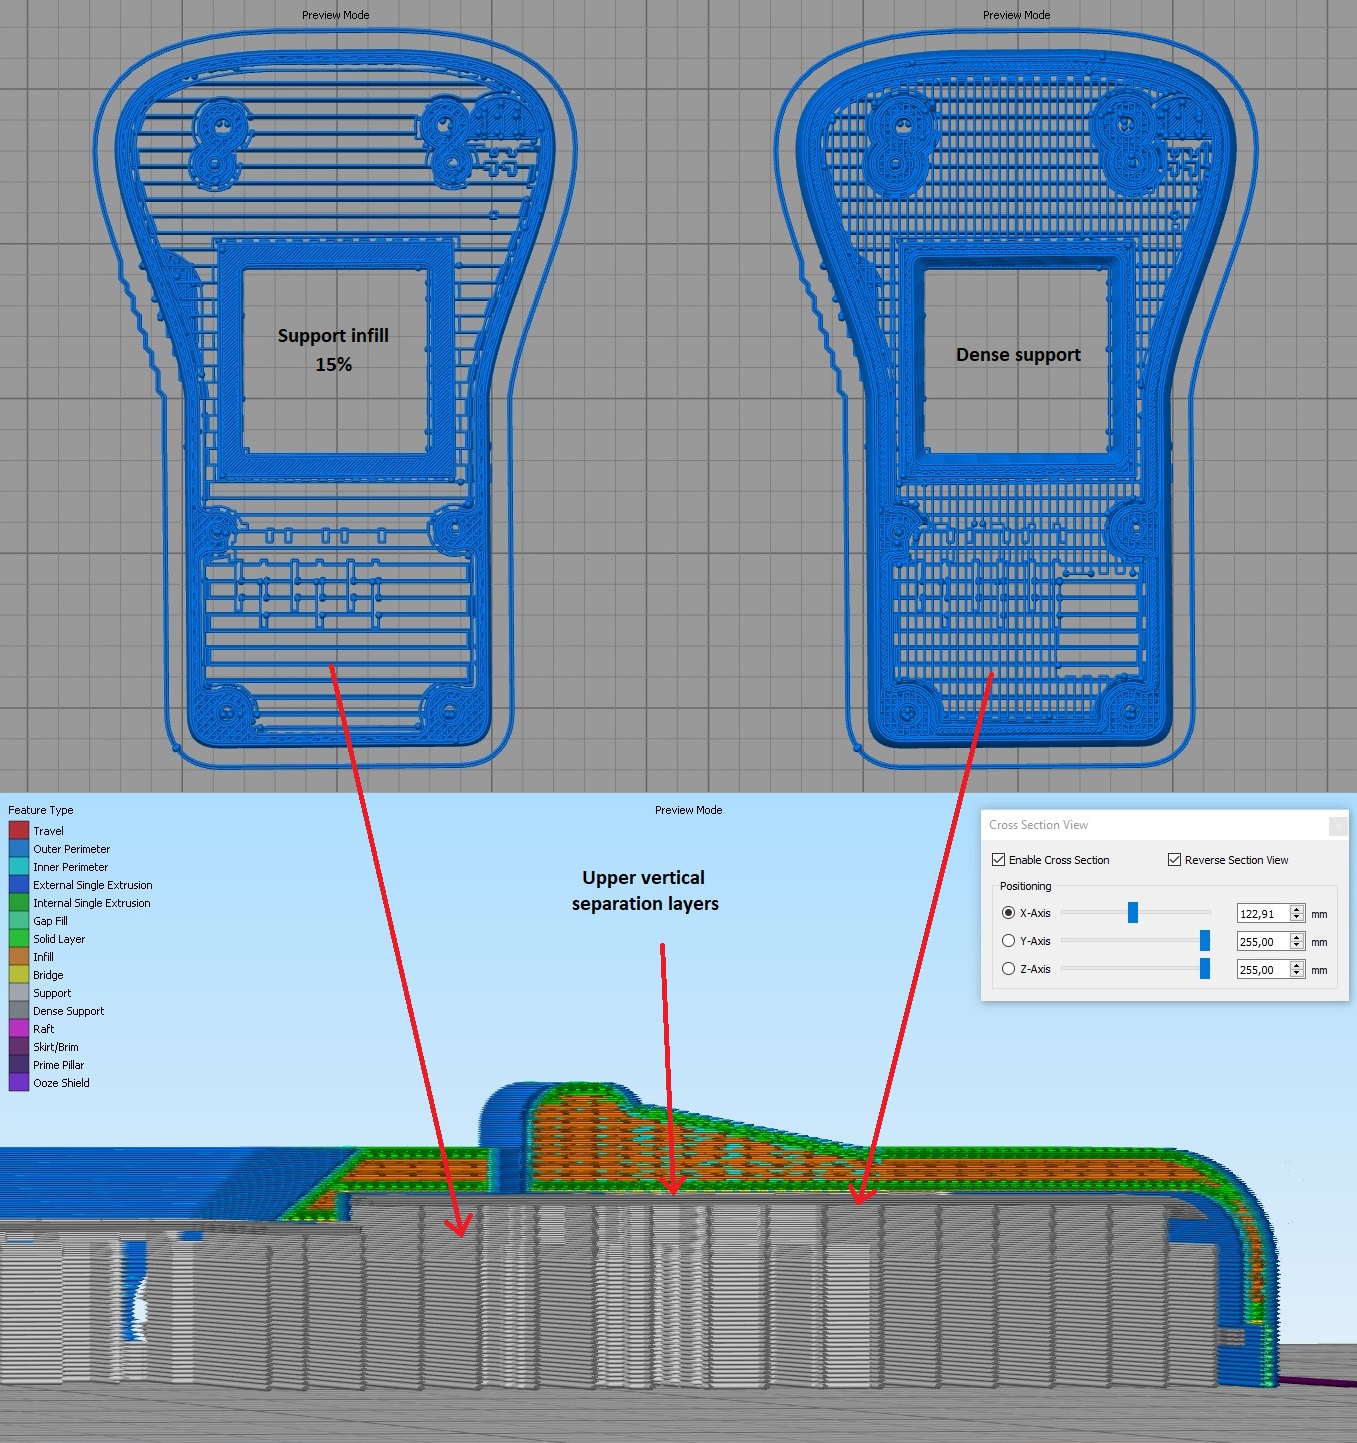
Choose 15% infill every 1 layer. It is the default filling of the supports. To increase the surface of the supports just before the printing of the case, put 4 dense layers of support with a filling percentage of 30%. In the “Distance to the part” section, choose 0.5mm horizontal offset from the part (the supports will not touch the part on the horizontal plane), “upper vertical separation layer” of 2 (the supports will no longer be printed two layers before printing the case and will be really easier to peel off!) and 1 lower vertical separation layer.
“Temperature” tab
Same settings as the bottom case. Plate 60°C, extruder 215°C
“Cooling” tab
Same settings as the bottom case.
“G-Code” tab
Same settings as the bottom case.
“Scripts” tab
Same settings as the bottom case.
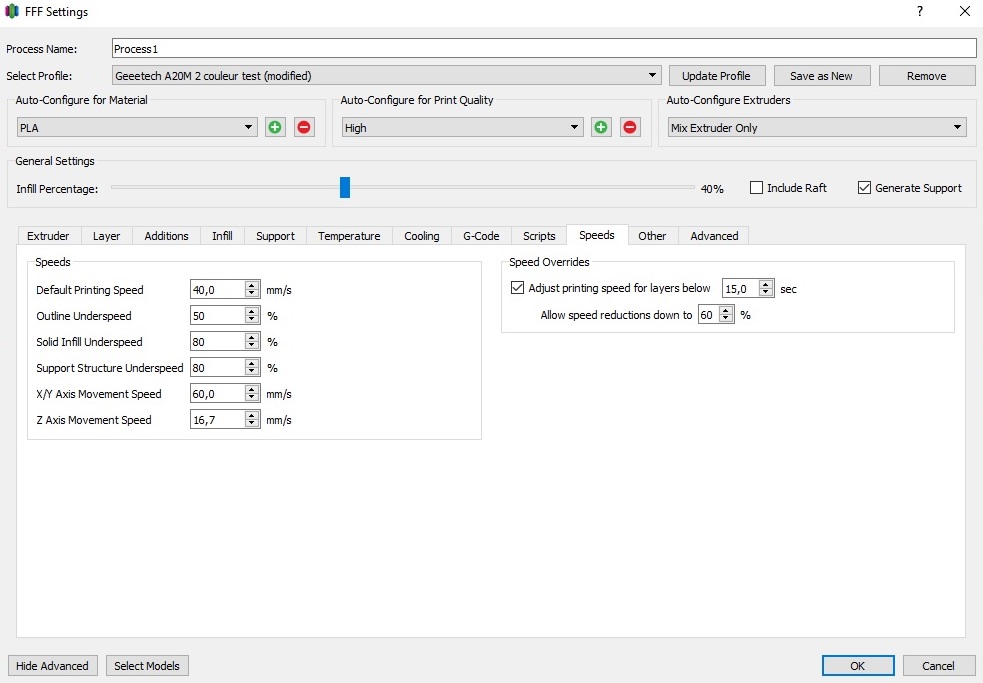
“Speeds” tab
To maximize the chances of success, the first layers will be printed at a speed of 40mm/s
“Other” tab
Same settings as the bottom case.
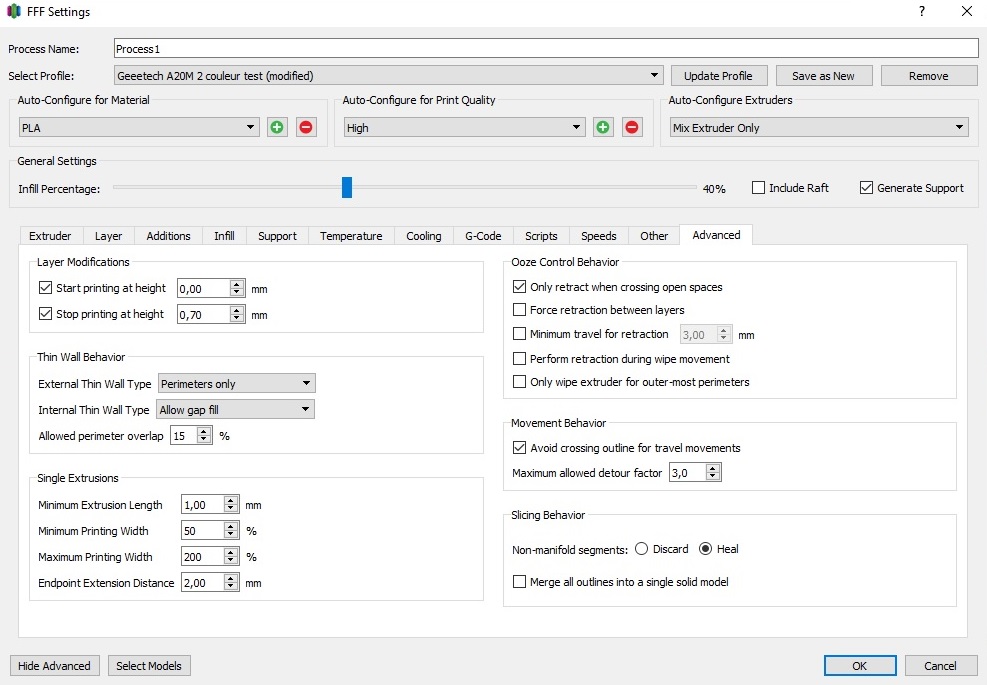
“Avanced” tab
It is in this window that we will choose the printing height on which each process will be applied. In our case, in the “Layer modification” window, we start the process 1 at 0mm and end it at 0.7mm. You can leave the other values as for the lower case.
Process 2
To add a new process, simply click on “add”. The previous process will be duplicated and you will just have to modify it.
In this second process, we will apply the same settings as process 1 except for the printing speed which will be changed from 40mm / s to 60mm / s. The height of the main layer will always be 0.2mm but the height of the main layer will be changed from 150% to 100%. In the “Advanced” tab, the printing heights will be modified so as to start at 0.7mm (end of process 1) and stop at 5.9mm
Process 3
In this third process, we will use the same settings as process 2 except for the height of the layers which will drop from 0.2mm to 0.1mm. The curvature of the case will thus be more finely printed. In the “Advanced” tab, the printing heights will be modified to start at 5.9mm and finally, you can uncheck the “Stop printing at height” box.