Bootloader
The GNUVario can use a special bootloader that load firmwares from the SD card. This avoid opening the variometer each time you want to update the code.
Warning ! You need a FAT16 formatted SD card. Check the configuration procedure.
Flashing the firmware using the bootloader
If the bootloader is already installed just compile the sketch you want to flash. Rename the firmware in FIRM.HEX and copy it to the SD card.
Next power ON the variometer with the screen facing to the ground. And during the three beeps return the variometer facing up. Be carefull ! The variometer is flashing the firmware so don’t power OFF it too early !
Installing the bootloader on a new Arduino board :
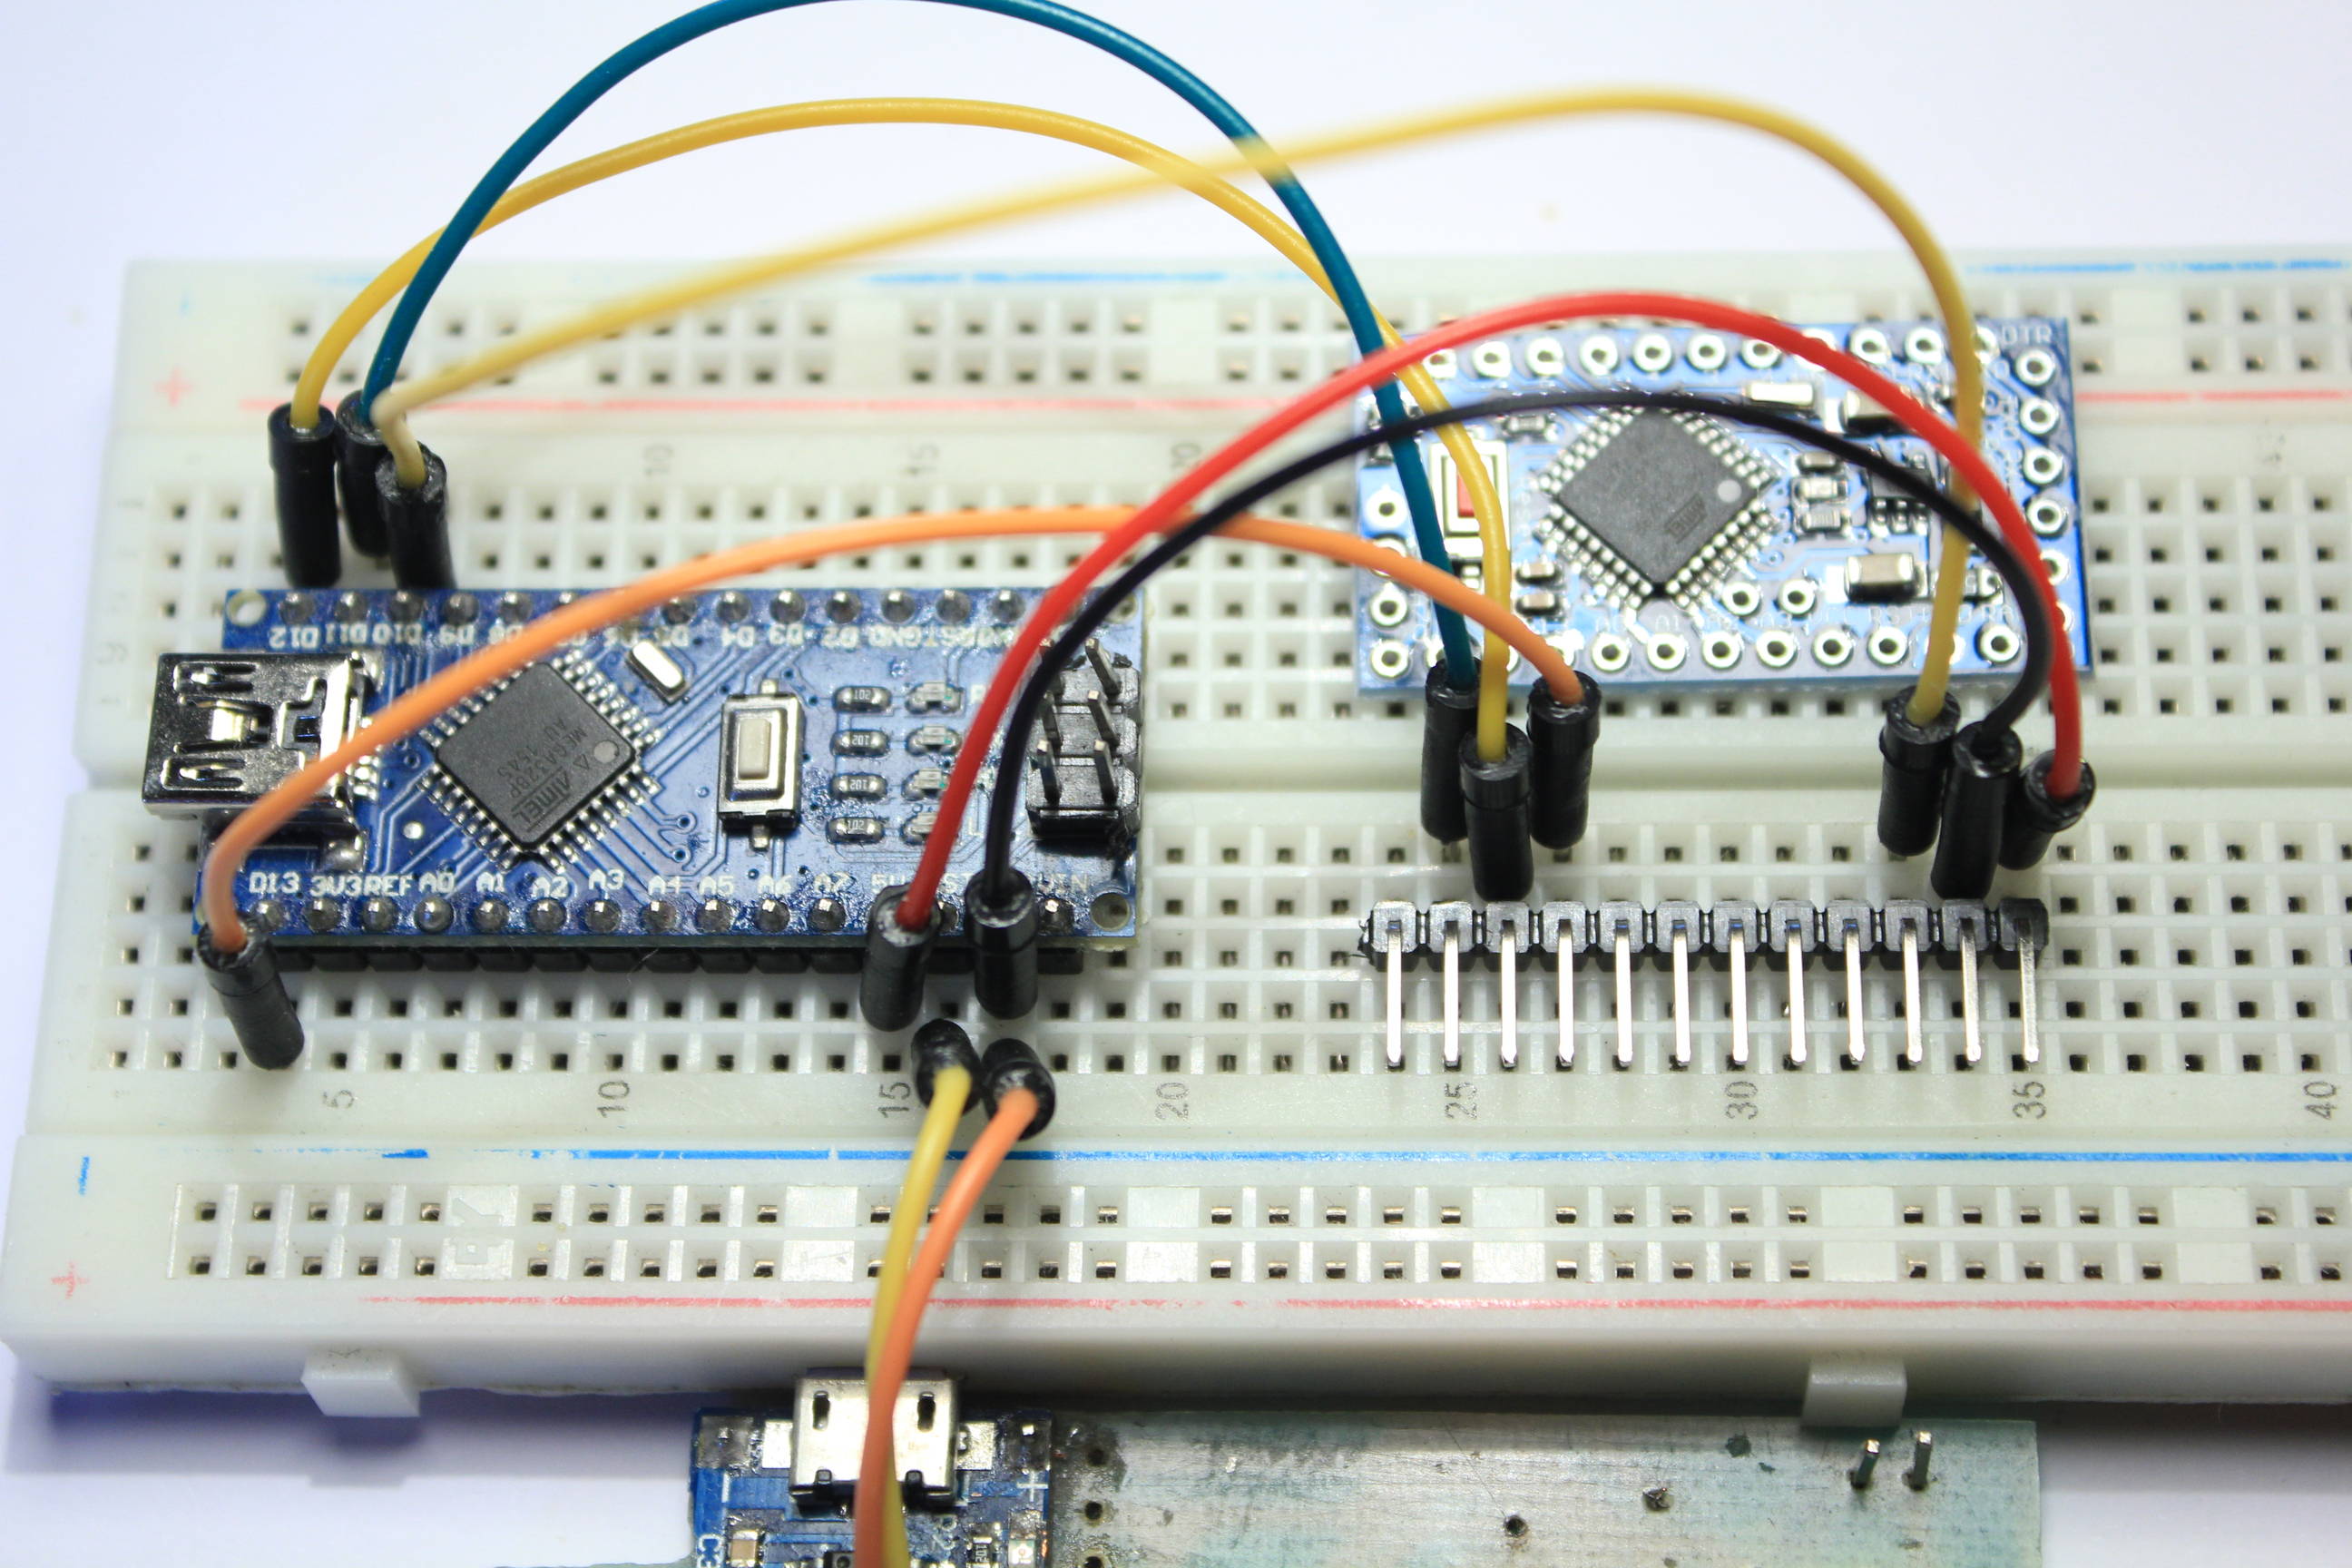
The steps are explained on the offical Arduino as ISP page. You need an additonnal Arduino to burn the bootloader. I like the Arduino Nano as the board is small and easy to use.
1) Setup the programming board
Follow these steps with the Arduino Nano. The board that will burn the bootloader inside the Pro Mini :
- Launch the Arduino IDE
- In the Tools menu choose the Arduino Nano board
- In File open Example -> Arduino ISP
- Upload this sketch inside the Nano board
2) Connect the variometer Arduino board
With a breadboard, connect the programming board to the variometer’s board like this :
| Arduino Nano | Arduino Pro mini |
|---|---|
| 5V | RAW |
| GND | GND |
| 13 | 13 |
| 12 | 12 |
| 11 | 11 |
| 10 | RESET |
Sometimes you need to add a capacitor between RESET and GND on the programming board. You can also use pin headers to connect the Arduino pro mini without soldering it.
3) Try to upload the default Arduino bootloader
Follow these steps to prepare the IDE :
- Launch the Arduino IDE
- set the board of the variometer’s Arduino board. Usually the Arduino pro mini 3.3V.
- In file -> preferences enable verbose output for upload.
- In Tools set programmer as Arduino as ISP.
- Connect the Nano and click on Tools -> Burn Bootloader
If this works you know now how to burn a bootloader. If not, check your wiring or add the capacitor between RESET and GND.
4) Burning the GNUVario’s bootloader
On the lower panel of the Arduino IDE search inside the upload code for a command that upload a .hex file.
Look at the path of this file and find it on your computer.
Replace the file with the GNUVario’s bootloader. Keep the same file name as the original Arduino bootloader !
Now redo the bootloader burning procedure. You’re done.