Manual
User manual summary
First start
Before you can use the Gnuvario-E you must install the software and then prepare the MicroSD card. To do this, you need to download:
- The tool Flash download tools from Espressif.
- The binary of GNUVario-E corresponding to your screen and printed circuit version, available on the download page.
- The two binaries required for a first compilation, available in the compressed folder Binaires_Flashdownloadtool.ZIP, available on the download page.
The different software versions can be broken down into 3 figures. The first indicates the version of the PCB, from 1 to 3. The last 2 correspond to the type of screen supported and its orientation on the variometer.
The currently supported combinations are:
| Gnuvario154 | PCB Version 1 with 1.54” display |
| Gnuvario254 | PCB Version 2 with 1.54” display |
| Gnuvario290 | PCB Version 2 with 2.9” landscape display (TTGO-T5-V2.4 before 12/2020) |
| Gnuvario291 | PCB Version 2 with 2.9” portrait screen(TTGO-T5-V2.4 before 12/2020) |
| Gnuvario292 | PCB Version 2 with 2.9” landscape display (Ecran Good Display GDEW029M06) |
| Gnuvario293 | PCB Version 2 with 2.9” portrait screen (Ecran Good Display GDEW029M06) |
| Gnuvario294 | PCB Version 2 with 2.9” portrait screen (TTGO-T5-V2.4 after 12/2020 Screen number DKEG0290BNS800F6 /QYEG0290BNS800F6C02 ) For test only, degraded display. |
| Gnuvario354 | PCB Version 3.1 with 1.54” display |
| Gnuvario390 | PCB Version 3.1 with 2.9” landscape display (TTGO-T5-V2.4 before 12/2021) |
| Gnuvario391 | PCB Version 3.1 with 2.9” portrait screen (TTGO-T5-V2.4 before 12/2021) |
| Gnuvario392 | PCB Version 3.1 with 2.9” landscape display Good Display GDEW029M06 |
| Gnuvario393 | PCB Version 3.1 with 2.9” portrait screen Good Display GDEW029M06 |
Updating the Gnuvario-E
Start the Gnuvario-E without the SD card, then connect it to the PC through the usb port. The PC will see the vario as a serial port, for example COM3.
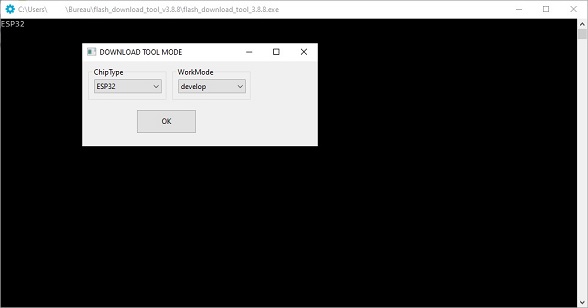
Run flash_download_tools.exe. choose the “Chip Type ESP32” and “WorkMode develop”.
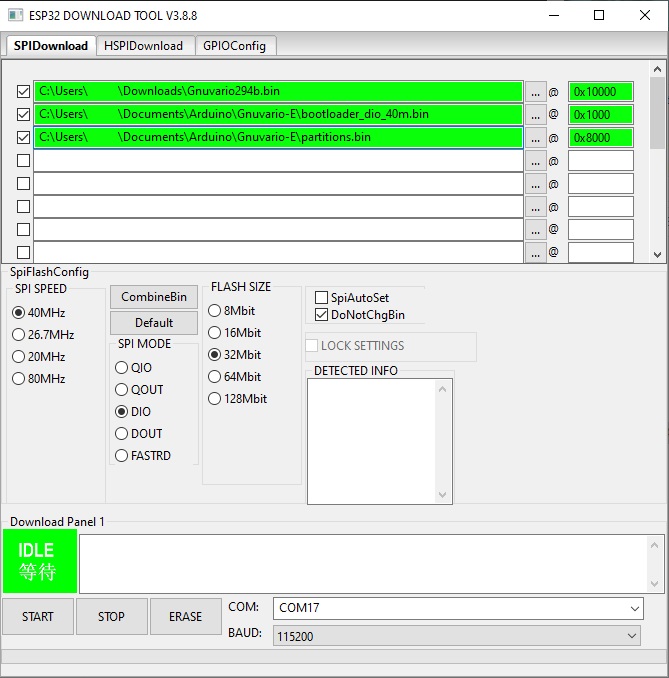
Select the following 3 files:
- The compiled binary of the GNUVario-e at address 0x10000. Here the Gnuvario294b version.
- The bootloader_dio_40m.bin binary at address 0x1000
- the binary partitions.bin at address 0x8000
Then in the window “SpiFlashConfig”, press the button “Default” or choose the options as in the image above (40MHz, DIO, 32Mbit, DoNotChgBin). Choose the COM port corresponding to the USB port to which your vario is connected.
Press the “Start” button. The green square “IDLE” then indicates “Download”, and a green progress bar is displayed at the bottom of the utility. Writing the software takes about 2 minutes. When it is finished, the green square displays “FINISH”.
You can then cut off the power to the Gnuvario-E and unplug the usb port.
Now it’s time to prepare the MicroSD card.